Downloaded 130 times
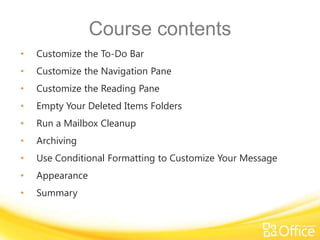
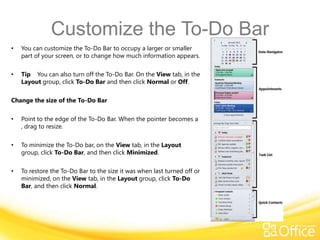
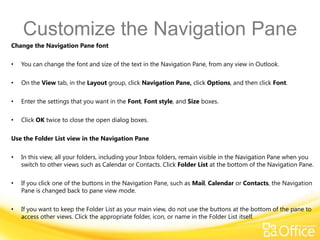


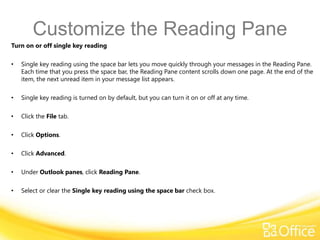


This document discusses various ways to customize and work more efficiently in Microsoft Outlook 2010. It covers how to customize the To-Do Bar, Navigation Pane, and Reading Pane. It also provides instructions for emptying the Deleted Items folder, running a Mailbox Cleanup to reduce file size, archiving older items, and using conditional formatting to customize message appearances. The goal is to help users work more efficiently by optimizing Outlook's interface and managing data.


![[GDG-Fremont] Building Multi-Agentic ecosystem using Gemini.pdf](https://cdn.slidesharecdn.com/ss_thumbnails/gdg-fremontbuildingmulti-agenticecosystemusinggemini-260601215542-0431b465-thumbnail.jpg?width=640&height=640&fit=bounds)


