Downloaded 114 times
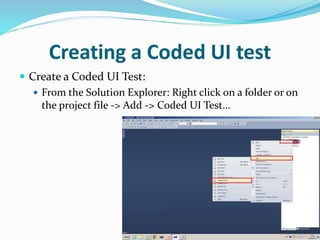


This document discusses using the Coded UI framework to create automated tests for a calculator application. It describes recording actions in the calculator to create a test, such as entering 2 + 3 =. Assertions are then added to verify the expected result is displayed. The generated code for the recorded test and assertion is examined. Further lessons will explore the generated code in more depth.


![TEST_AUTOMATION_CASE_STUDY_(2)2[1]](https://cdn.slidesharecdn.com/ss_thumbnails/a9c158f4-db61-4cf3-afa9-b0123ffabf86-160903185545-thumbnail.jpg?width=640&height=640&fit=bounds)