
Bring LangChain agents into your JupyterLab workflow
- Source code: github.com/dkedar7/langstage-jupyter
- Installation:
pip install -U langstage-jupyter(renamed fromdeepagent-lab— the old name now just installs this one, and thedeepagent-labcommand still works)
A JupyterLab extension to allow your LangChain agents access to JuputerLab notebooks and files, enabling natural language interactions with your data science projects directly from JupyterLab.
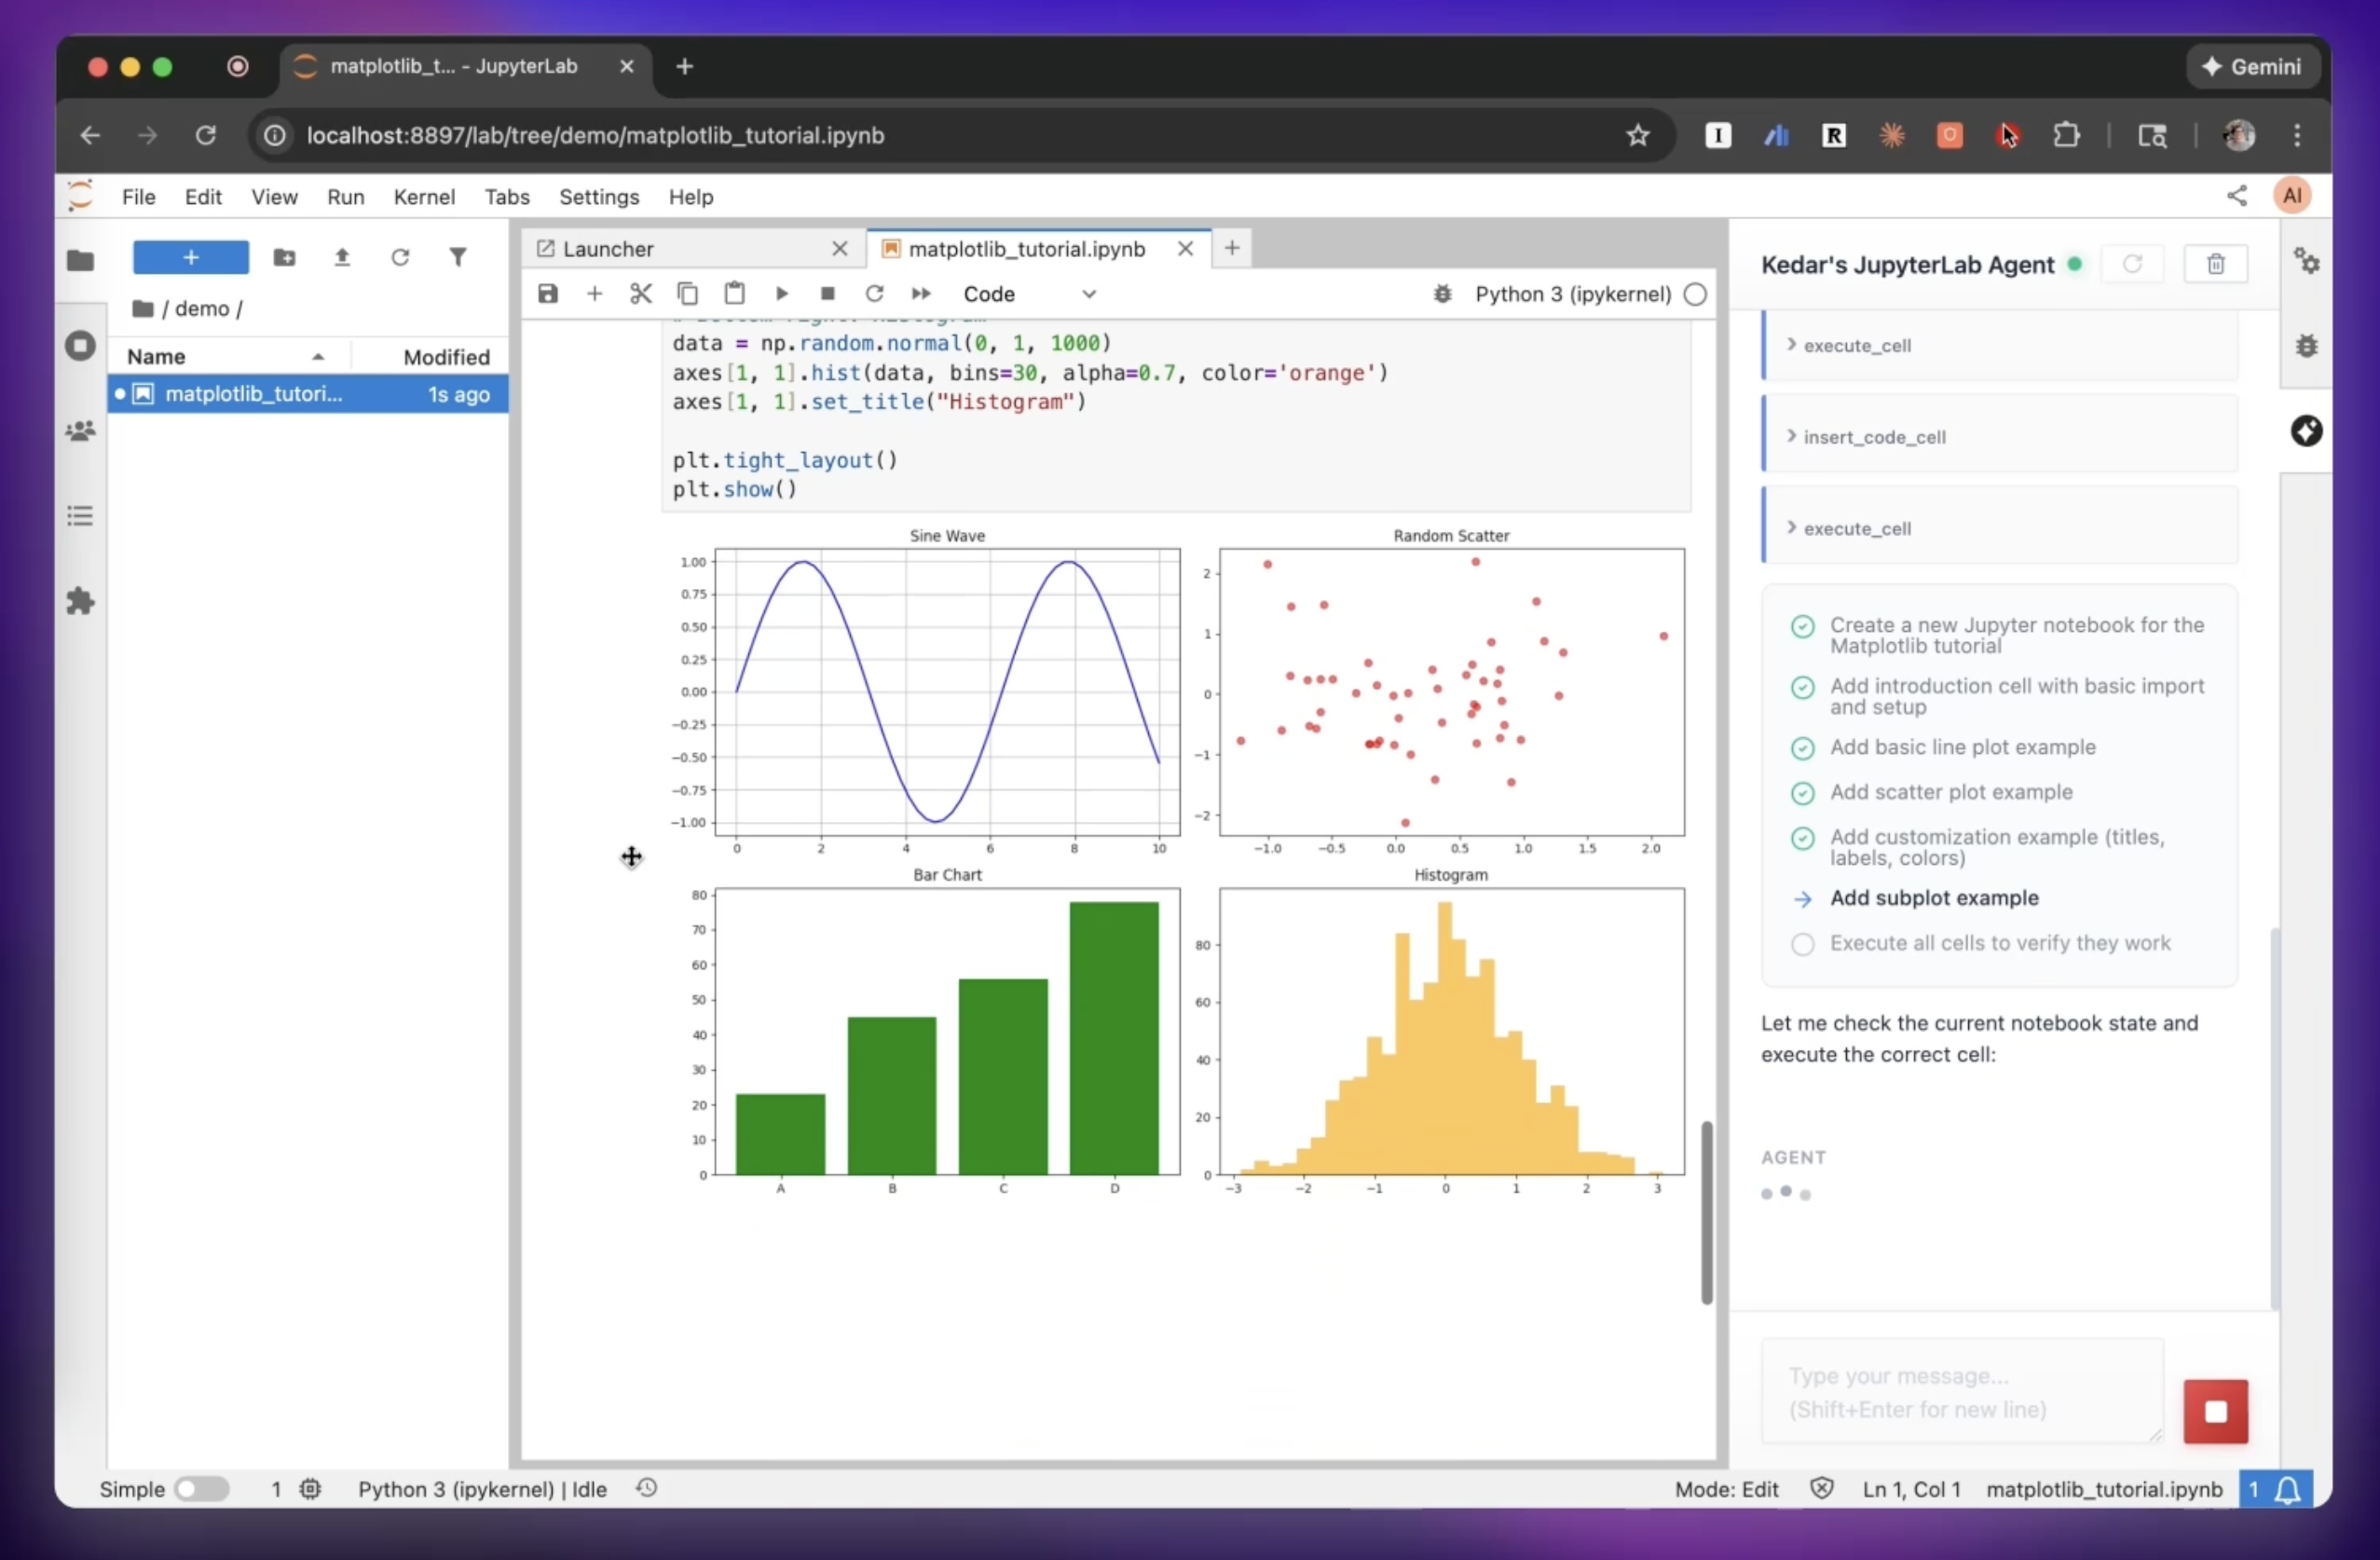
Watch the full demo video here: https://www.youtube.com/watch?v=vGA2vzMSQzo
langstage-jupyter is the JupyterLab stage of the LangStage family: write your agent once — any LangGraph CompiledGraph — and run it on every stage with the same spec string (module:attr or path/to/file.py:attr), the same langstage.toml config file, and the same LANGSTAGE_* environment variables.
| Stage | Package | Try it |
|---|---|---|
| Web app | langstage | langstage run --agent my_agent.py:graph |
| JupyterLab | langstage-jupyter | you are here |
| Terminal | langstage-cli | langstage-cli -a my_agent.py:graph |
| VS Code | langstage-vscode | chat participant + stdio sidecar |
| Reference agent | langstage-hermes | LANGSTAGE_AGENT_SPEC=langstage_hermes.agent:graph on any stage |
| Shared core | langstage-core | typed events + config resolver + AG-UI bridge behind every stage |
The chat sidebar already streams every turn through the in-process AG-UI adapter. Your agent — any LangGraph CompiledGraph — can also be served over the AG-UI protocol as a standalone HTTP endpoint:
pip install "langstage-core[agui]"
langstage-agui --agent my_agent.py:graph
📖 Full documentation: https://dkedar7.github.io/langstage-docs/
- Chat Interface: Sidebar for natural conversations with your agent
- Notebook Manipulation: Built-in tools for creating, editing, and executing Jupyter notebooks
- Human-in-the-Loop: Review and approve agent actions before execution
- Context Awareness: Automatically sends workspace and file context to your agent
- Custom Agents: Use your own langgraph-compatible agents seamlessly
- Auto-Configuration: Zero-config setup with automatic Jupyter server detection
pip install langstage-jupyterInstead of jupyter lab, use langstage-jupyter command for automatic setup.
The easiest way to get started is using the langstage-jupyter launcher command, which automatically configures everything for you:
# Set your API key (if using the default agent)
export ANTHROPIC_API_KEY=your-api-key-here

# Start JupyterLab with auto-configuration
langstage-jupyter
That's it! The launcher will:
- Auto-detect an available port (starting from 8888)
- Generate a secure authentication token
- Set the required environment variables
- Launch JupyterLab with the proper configuration
Using custom arguments:
# All jupyter lab arguments are supported
langstage-jupyter --no-browser
langstage-jupyter --port 8889

# Pick the agent right from the launcher (same spec format as every
# LangStage stage; sets LANGSTAGE_AGENT_SPEC for you)
langstage-jupyter -a my_agent.py:graph

# No agent or API key yet? Launch with the keyless demo agent
langstage-jupyter --demo

# Print the resolved configuration (each value, its source, and the
# env var / langstage.toml key that sets it) and exit
langstage-jupyter --show-config
Running several sessions at once: just launch the command again with a different agent — each
session is its own process, picks the next free port (scanning 8888-8987), gets its own token,
and its notebook tools only ever talk to its own Jupyter server, so sessions don't interfere:
langstage-jupyter -a agent_a.py:graph    # -> localhost:8888
langstage-jupyter -a agent_b.py:graph    # -> localhost:8889
Widen the scan with LANGSTAGE_JUPYTER_PORT_ATTEMPTS (default 100), or pin a port with --port.
Note that two sessions launched from the same directory serve the same notebooks on disk —
launch from different directories if you want separate workspaces.
Three headless, no-browser preflights that exit 0/1 — handy in CI or before a deploy:
# Preflight the AGENT OBJECT: load the configured (or --demo) agent and run one real
# turn through it. Catches a bad API key / broken tool / non-runnable graph. (For the
# default agent with no key it now names the missing variable, e.g. ANTHROPIC_API_KEY.)
langstage-jupyter --verify

# Preflight the SERVED ENDPOINT: boot the server extension, poll /langstage-jupyter/health
# until the agent is loaded, then POST one turn to /langstage-jupyter/chat and assert the
# SSE stream completes. Catches route/registration/handler regressions that --verify can't
# (it never touches HTTP). Defaults to the keyless demo agent; add -a to test a real one.
langstage-jupyter --serve-check
langstage-jupyter -a my_agent.py:graph --serve-check

# Preflight the MANUAL-CONFIG CONNECTION: confirm the configured
# LANGSTAGE_JUPYTER_SERVER_URL + LANGSTAGE_JUPYTER_TOKEN actually reach a running,
# auth-matching Jupyter (GET {url}/api/status with the token). Only meaningful for the
# manual-config flow below — the launcher auto-manages these values. (--check-server alias.)
langstage-jupyter --check-connection
--check-connection names the distinct failure modes:
$ langstage-jupyter --check-connection
[ ok ] reached http://localhost:8888 — token accepted (Jupyter Server 2.20.0)

# wrong port / server not up:
[fail] http://localhost:8888 unreachable — is a Jupyter server running there? ...

# URL right, token wrong (a stale token, a drifted --IdentityProvider.token):
[fail] http://localhost:8888 returned 403 — LANGSTAGE_JUPYTER_TOKEN does not match ...
Unlike --serve-check (which boots its own ephemeral server with a fresh token),
--check-connection tests your configured URL+token against an already-running server.
The extension serves its REST/SSE routes under /<base_url>langstage-jupyter/:
health (GET), chat (POST, SSE), resume (POST, SSE), reload (POST), cancel (POST).
If you prefer manual control or need to use jupyter lab directly, you can set the environment variables yourself:
- Configure environment variables (create a
.envfile or export):
# Required: Jupyter server configuration
export LANGSTAGE_JUPYTER_SERVER_URL=http://localhost:8888
export LANGSTAGE_JUPYTER_TOKEN=$(python3 -c "import secrets; print(secrets.token_urlsafe(32))")

# If using the default agent, set your API key
export ANTHROPIC_API_KEY=your-api-key-here- Start JupyterLab with matching configuration:
jupyter lab --port 8888 --IdentityProvider.token=$LANGSTAGE_JUPYTER_TOKENImportant: The server URL and token must match between your environment variables and JupyterLab's startup parameters.
Verify they do — before you start chatting — with the connection preflight:
langstage-jupyter --check-connection
# [ ok ] reached http://localhost:8888 — token accepted (Jupyter Server 2.20.0)
It exits 0 when the configured LANGSTAGE_JUPYTER_SERVER_URL + LANGSTAGE_JUPYTER_TOKEN reach a running, auth-matching Jupyter, and 1 (naming the reason) when the server is unreachable or the token is rejected.
langstage-jupyter is designed to work with any langgraph-compatible agent. You can easily use your own langgraph-compatible agents instead of the default agent.
Create a file with your agent (e.g., my_agent.py):
from deepagents import create_deep_agent
from deepagents.backends import FilesystemBackend
from langgraph.checkpoint.memory import MemorySaver
import os

# The agent automatically discovers the workspace
workspace = os.getenv('LANGSTAGE_WORKSPACE_ROOT', '.')

# Create your custom agent
agent = create_deep_agent(
    name="my-custom-agent",  # Optional: name shown in chat interface
    model="anthropic:claude-sonnet-4-20250514",
    backend=FilesystemBackend(root_dir=workspace, virtual_mode=True),
    checkpointer=MemorySaver(),
    tools=[],  # add your custom tools here, e.g. [my_tool, another_tool]
)Set the LANGSTAGE_AGENT_SPEC environment variable to point to your agent:
# Format: path/to/file.py:variable_name
export LANGSTAGE_AGENT_SPEC=./my_agent.py:agent
Then launch as normal:
# With the launcher (recommended)
langstage-jupyter

# Or manually
jupyter lab --port 8888 --IdentityProvider.token=$LANGSTAGE_JUPYTER_TOKEN
The chat interface will automatically display your custom agent's name (if you set the name attribute).
Agents configured for langstage-jupyter work seamlessly with every other LangStage stage:
# Same configuration works everywhere!
export LANGSTAGE_AGENT_SPEC=./my_agent.py:agent
export LANGSTAGE_WORKSPACE_ROOT=/path/to/project

# Run in JupyterLab
langstage-jupyter

# Or in the browser / terminal
langstage run
langstage-cliAll configuration uses the LANGSTAGE_ prefix (the pre-rename DEEPAGENT_ names still resolve as deprecated fallbacks):
| Variable | Purpose | Default | When to Set |
|---|---|---|---|
LANGSTAGE_AGENT_SPEC |
Custom agent location (path:variable) |
Uses default agent | Optional: for custom agents |
LANGSTAGE_WORKSPACE_ROOT |
Working directory for agent | JupyterLab root | Optional |
LANGSTAGE_JUPYTER_SERVER_URL |
Jupyter server URL | Auto-detected | Manual config only |
LANGSTAGE_JUPYTER_TOKEN |
Jupyter auth token | Auto-generated | Manual config only |
ANTHROPIC_API_KEY |
Anthropic API key | None | Required for default agent |
When using the langstage-jupyter launcher, LANGSTAGE_JUPYTER_SERVER_URL and LANGSTAGE_JUPYTER_TOKEN are automatically configured and don't need to be set.
See .env.example for a complete configuration template.
- ⟳ Reload: Reload your agent without restarting JupyterLab (useful during agent development)
- Clear: Start a new conversation thread
- Status Indicator (hover for details):
- 🟢 Green: Agent ready — it can actually run a turn
- 🟠 Orange: Loaded but not ready — e.g. the default agent's
ANTHROPIC_API_KEYisn't set (the first turn would fail), or an uncompiled graph was exported. The tooltip says what to fix. - 🔴 Red: Agent error — the agent module didn't load
See CONTRIBUTING.md for development setup and guidelines.
MIT License - see LICENSE for details.