View
Apigee Edge documentation.


What you'll learn
Through this tutorial, you'll learn to:
What you'll need
curl.In this tutorial, you'll add and configure the SpikeArrest policy to guard the target
service against sudden traffic spikes that can be caused by an increase in usage, buggy clients,
or malicious attacks. When the number of requests exceeds the rate limit, the API returns an
HTTP 429 error.
To add the SpikeArrest policy to an API proxy:
In the Google Cloud console, go to the Apigee > Proxy development > API Proxies page.
If you followed the Get Started tutorial, you can add it to the API proxy you created in Create an API proxy.
In the Create policy dialog, click in the Select policy type field and scroll down to Traffic Management and select SpikeArrest.
Optionally, you can change the Name and Display name of the policy. By default, Apigee provides a short prefix for the policy name, in this case, SA-. You can add a sequence of descriptive words, separated by dashes, after the prefix. See Naming conventions.
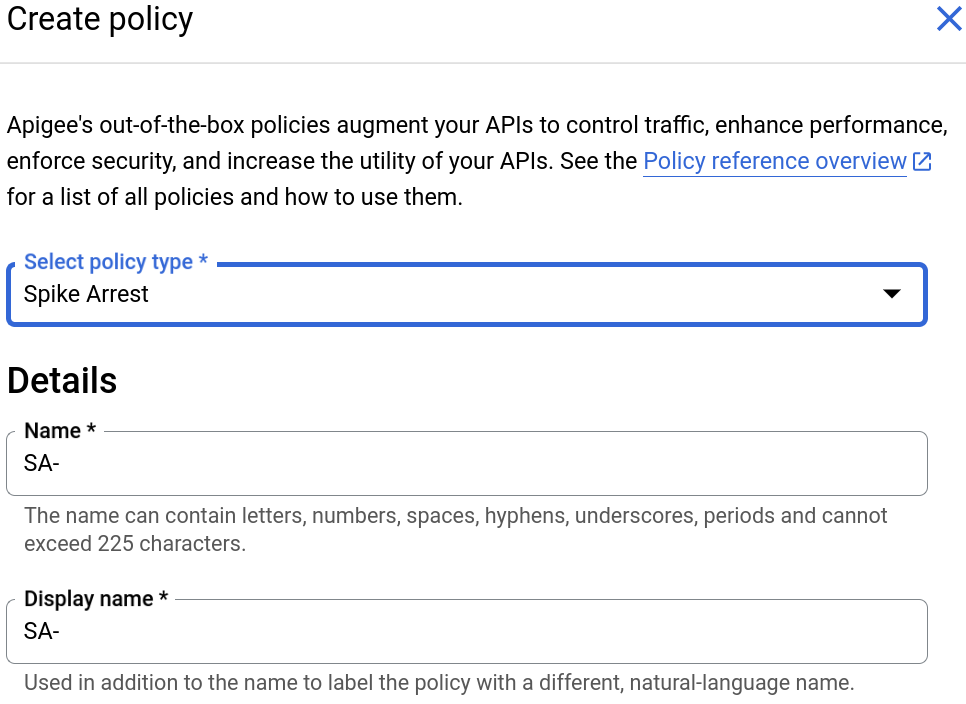
When you are done, click Create to create the policy.
Now that you have created the Spike Arrest policy, you can add it to a step in the PreFlow.
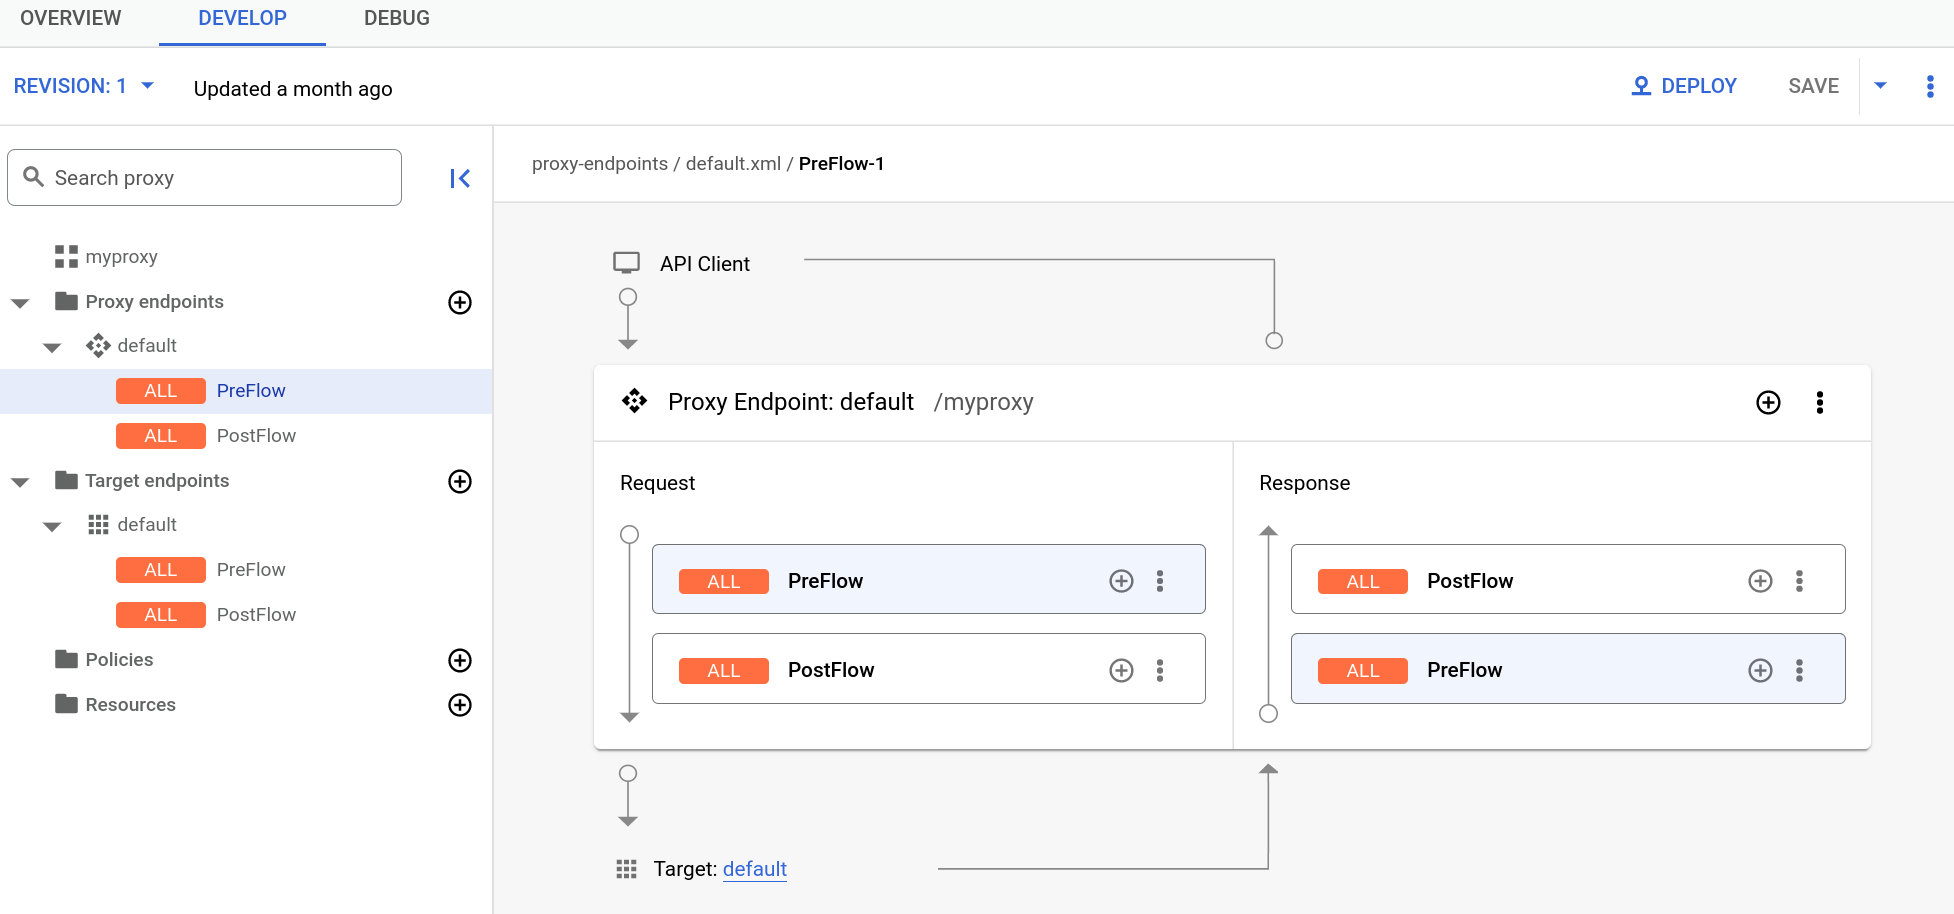
Note: You may need to expand the visual editor in the right-hand pane to see all the elements. To do so, click and drag the divider between the visual editor and the text editor down a little.
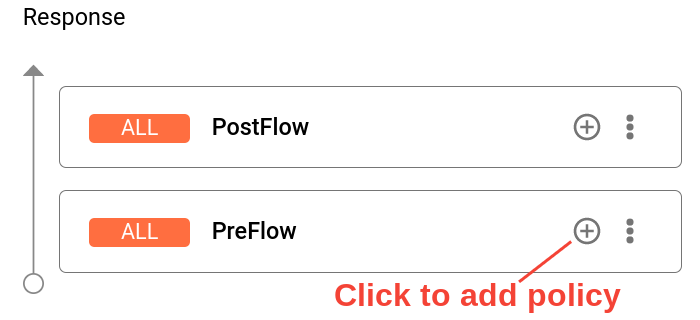
Click Add to attach the policy.
The Spike Arrest policy is now displayed in the Response pane:
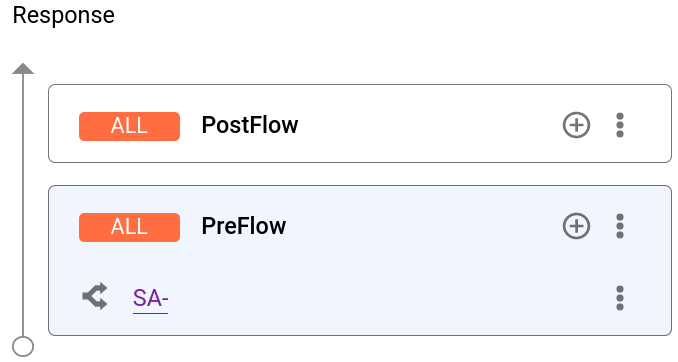
Now that you have attached the Spike Arrest policy to the PreFlow, you can try changing the code for the policy:
In the Response pane, select SA-.

<?xml version="1.0" encoding="UTF-8" standalone="yes"?>
<SpikeArrest continueOnError="false" enabled="true" name="SA-">
    <DisplayName>SA-</DisplayName>
    <Properties/>
    <Identifier ref="request.header.some-header-name"/>
    <MessageWeight ref="request.header.weight"/>
    <Rate>30ps</Rate>
</SpikeArrest>
In the XML for the policy, change the value of the
<Rate> element to 1pm (which
translates into roughly two requests allowed every 60 seconds in the cloud).
You can specify the rate as an integer value per minute (pm) or per
second (ps). This is a very low limit and is used only for this tutorial to
demonstrate the policy. Typically, you set it to a much higher limit.
Notice that the Rate value in the Property Inspector also changes to 1pm.
Alternatively, you can change the Rate value in the Property Inspector
and it will be reflected in the XML view.
Except as otherwise noted, the content of this page is licensed under the Creative Commons Attribution 4.0 License, and code samples are licensed under the Apache 2.0 License. For details, see the Google Developers Site Policies. Java is a registered trademark of Oracle and/or its affiliates.
Last updated 2026-07-23 UTC.

