Use prompt files in VS Code
Prompt files simplify prompting for common tasks by encoding them as standalone Markdown files that you invoke as slash commands in chat. Each prompt file includes task-specific context and guidelines about how the task should be performed.
Unlike custom instructions that are applied automatically, you invoke prompt files manually in chat. See the decision matrix to compare prompt files with custom agents, agent skills, and the other options.
Use prompt files to:
- Simplify prompting for common tasks, such as scaffolding a new component, running and fixing tests, or preparing a pull request
- Override default behavior of a custom agent, such as creating a minimal implementation plan or generating mockups for API calls
With Local selected, use the Agent Customizations editor to discover, create, and manage prompt files. Run Chat: Open Customizations from the Command Palette.
Prompt files run only in Local harness sessions in the Chat view. For reusable workflows in other harnesses, create an agent skill or convert an existing prompt file to a skill.
Before writing a prompt file, consider reusing a skill from the Customization Marketplace for the same task. This installs a skill, not a Local prompt file. Follow the skill's harness requirements and invocation instructions.
Create a prompt file
Before creating a prompt file, select the Local harness in the Chat view. Choose whether to store the file in your workspace or user profile. Workspace prompt files are available to Local sessions in that workspace. User prompt files are available to Local sessions across workspaces in the same profile.
Use the Agent Customizations editor to create the file in the selected scope:
-
In the Chat view, select Open Customizations in the title bar to open the Agent Customizations editor, and then select Prompts.
-
Select New Prompt (plus icon) next to the Workspace or User group, depending on where you want to store the prompt file.

-
Select the location and enter a file name for your prompt file. This is the default name that appears when you type
/in chat. -
Replace the generated content with this self-contained prompt:
--- name: review-api-security agent: agent description: Review a REST API implementation for common security risks argument-hint: [API folder or file] --- Review the REST API implementation identified by the user. If no path is provided, ask which folder or file to review. Check authentication, authorization, input validation, sensitive-data handling, and rate limiting. Do not claim that a control exists unless the available code demonstrates it. Return a Markdown TODO list grouped by high, medium, and low priority. For each item, cite the relevant file and explain the risk. If you find no issue in a category, say what you checked. -
Save the file. You can modify it later by opening it in the Agent Customizations editor.
As alternatives, run Chat: New Prompt File or Chat: New Untitled Prompt File from the Command Palette (⇧⌘P (Windows, Linux Ctrl+Shift+P)), or enter /prompts in a Local chat to open Configure Prompt Files.
Generate a prompt file with AI
An agent with file-editing tools can help author a prompt file, even if you use a different harness to write it. Tell the agent that the file will run in a Local session and describe the task, expected output, and storage location. Review the generated file before using it.
Authoring a .prompt.md file in a Copilot session doesn't make that file runnable by the Copilot harness. To reuse a workflow in that harness, create a skill or convert an existing prompt file.
With Local selected, you can also type /create-prompt in chat followed by the description. The agent asks clarifying questions, generates a .prompt.md file with appropriate frontmatter and instructions, and offers you a choice between workspace and user storage. The /create-prompt command isn't available for other harnesses.
You can also ask an agent to capture an ongoing conversation as a prompt file for Local sessions. Specify the target harness so that it doesn't create a customization in a format you can't use.
With Local selected in the Chat view, you can also generate a prompt file from the Agent Customizations editor by selecting Generate with AI next to the Workspace group in the Prompts section.
Use a prompt file in chat
Select Local in the Chat view before running the prompt. The following options run prompt files in Local sessions:
-
In the Chat view, type
/followed by the prompt name in the chat input field. Agent skills also appear as slash commands alongside prompt files.You can add extra information in the chat input field. For example,
/review-api-security src/apiidentifies the API folder to review. -
Run the Chat: Run Prompt command from the Command Palette (⇧⌘P (Windows, Linux Ctrl+Shift+P)) and select a prompt file from the Quick Pick.
-
Open the prompt file in the editor, and press the play button in the editor title area. You can choose to run the prompt in the current chat session or open a new chat session.
This option is useful for quickly testing and iterating on your prompt files.
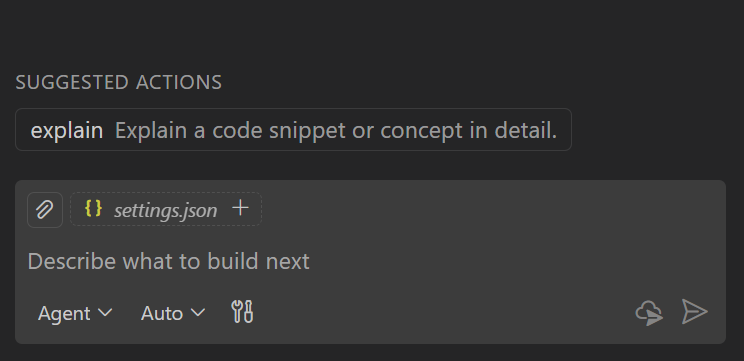
Use the chat.promptFilesRecommendations setting to show prompts as recommended actions when starting a new chat session.
Verify and refine a prompt file
Test discovery and effectiveness separately:
- Start a fresh Local chat in the workspace where you created the prompt.
- Type
/and confirm that/review-api-securityappears. If it does not, follow Troubleshoot prompt files. - Run
/review-api-securityfollowed by the path to a small API file or folder. - Confirm that the result cites files, groups findings by priority, and distinguishes observed controls from missing or uncertain controls.
- Open the prompt file, adjust instructions that produced an unclear or unsupported result, and use the editor play button to rerun the same request in a new chat.
Discovery only confirms that the Local harness found the file. Review the result and tool activity to determine whether the prompt is effective for your task.
Troubleshoot prompt files
If a prompt is missing or produces an unexpected result:
- Confirm that the session target is Local and that the file has the
.prompt.mdextension. - Confirm that a workspace prompt is in
.github/promptsfor the open workspace, or that the user prompt is in the current VS Code profile. - Check the YAML frontmatter for syntax errors and confirm that configured agents, models, and tools are available.
- Run the prompt in a fresh chat to avoid context from an earlier task.
- Open the Agent Debug Log panel from the ellipsis (...) menu in the Chat view to inspect discovery and related errors. Learn more about troubleshooting AI in VS Code.
Prompt file reference
Locations
You can define prompt files for a specific workspace or at the user level, where they are available across all your workspaces. The following table lists the default file locations that the Local harness uses for prompt files.
| Scope | Default file location |
|---|---|
| Workspace | .github/prompts folder |
| User profile | Your user data (specific to your VS Code profile) |
To create a user-level prompt file, use the Agent Customizations editor or the Chat: New Prompt File command.
In a monorepo, enable chat.useCustomizationsInParentRepositories to discover prompt files from the parent repository root. Learn more about parent repository discovery.
File format
Prompt files are Markdown files with the .prompt.md extension. The optional YAML frontmatter header configures the prompt's behavior:
| Field | Required | Description |
|---|---|---|
description |
No | A short description of the prompt. |
name |
No | The name of the prompt, used after typing / in chat. If not specified, the file name is used. |
argument-hint |
No | Hint text shown in the chat input field to guide users on how to interact with the prompt. |
agent |
No | The agent used for running the prompt: ask, agent, plan, or the name of a custom agent. By default, the current agent is used. If tools are specified, the default agent is agent. |
model |
No | The language model used when running the prompt. If not specified, the currently selected model in model picker is used. |
tools |
No | A list of tool names that are available for this Local harness prompt. Can include built-in tools, MCP tools, or tools contributed by extensions. To include all tools of an MCP server, use the <server name>/* format. Existing tool-set references are deprecated; see Replace tool sets.Learn more about tools with agents. |
If a given tool is not available when running the prompt, it is ignored.
The body contains the prompt text in Markdown format. Provide specific instructions, guidelines, or any other relevant information that you want the AI to follow.
Reference files
You can reference files in the prompt body by using Markdown links or the #file: syntax.
- For files in your workspace, use paths relative to the prompt file. For example,
[coding standards](../instructions/coding.instructions.md)references a file in a siblinginstructionsfolder. - For files in your environment user home folder, use
~or start the path with~/. A standalone~references the user home folder, and a path such as~/prompts/style-guide.mdresolves from that folder.
Use Unix-style / path separators to keep prompt files portable across operating systems.
The following example uses both reference formats to reference files in the user home folder:
Review [my personal instructions](~/copilot/instructions.md).
Use #file:~/templates/component.md as the component template.
To reference agent tools in the body text, use the #tool:<tool-name> syntax. For example, to reference the browser tool, use #tool:browser.
If you want the user to provide additional information, you can use the vscode/askQuestion tool. You can also use a syntax like ${input:variableName}, ${input:variableName:placeholder}. Most language models understand this syntax and will prompt for these inputs.
Tool list priority
You can specify the list of available tools for both a custom agent and prompt file by using the tools metadata field. Prompt files can also reference a custom agent by using the agent metadata field.
The list of available tools in chat is determined by the following priority order:
- Tools specified in the prompt file (if any)
- Tools from the referenced custom agent in the prompt file (if any)
- Default tools for the selected agent (if any)
Sync user prompt files across devices
VS Code can sync your user prompt files across multiple devices by using Settings Sync.
To sync your user prompt files, enable Settings Sync and run Settings Sync: Configure from the Command Palette (⇧⌘P (Windows, Linux Ctrl+Shift+P)). Select Prompts and Instructions from the list of settings to sync.
Tips for writing effective prompts
-
Clearly describe what the prompt should accomplish and what output format is expected.
-
Provide examples of the expected input and output to guide the AI's responses.
-
Use Markdown links to reference custom instructions rather than duplicating guidelines in each prompt.
-
Take advantage of built-in variables like
${selection}and input variables to make prompts more flexible. -
Use the editor play button to rerun the same task after changing a prompt.